Joywing
Simple race wing, 2019.
transcript
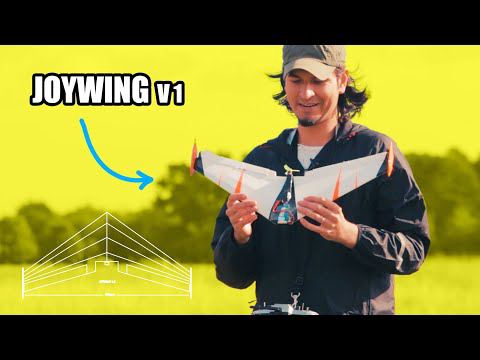
[Music] this is a mini flying wind that have called joy winged is the version number one and in this video you will learn how to build it from beginning to end we will see its performance in flight and will improve the next versions too let's start [Music] this little flying machine begins its life the same way as any other machine in this channel first of all I made the design in AutoCAD until I thought it was the right measurements and it was ready to be built it took me a couple of weeks in my spare time to finish it but it's finally done and you'll be able to download the PDF plans off the description of this video you can bring the PDF version that is two sheets of paper per wing [Music] the main material I'm going to use to build this is foam board this is a widely used material and if you follow flight tests they use it a lot to build their airplanes is really cheap and easy to work with the plans are color coded blue lines means that you have to cut the material only 50% note the whole way through black lines are a hole cut so you have to cut clean grey lines are just references so you have to cut anything and the orange hatch lines means that you have to cut a 45-degree angle to make it easy to bend corners or to glue one layer to the other I always recommend using a very sharp blade to make the cuts otherwise that cuts get very nasty so recommend replacing the blade often like every 10 minutes or so and now I'm building the second wing is the exact same procedure and this is the 45 degree angle cut that I mentioned before notice how it'll join the other layer perfectly now I'm going to apply hot glue on the edges to join everything together you can easily use any other kind of glue but hot glue has the advantage that will harden fast if you use hot glue make sure that you're using a good brand so it works great I recommend using a reinforcement inside the wing some sort of a wooden stick or barbecue skewer but in this first version that I didn't use it until I found out later that I had to put one [Music] the rest of the build is really easy and straightforward the elements in the plans you will see that you have to cut them but you can actually do whatever you want with the elements in my case I used a 45 degree angle cut technique to make a natural hinge with the same material let's begin with the electronics right now servos and before I forget I will mark the CG points or the center of gravity where the wind should balance itself since the ESC that I'm using doesn't have a voltage regulator to power the receiver and servos I'm using a buck converter I calibrated this buck converter to output 5 volts so that way I will power them from the same battery is actually a very easy connection so I'm not going to explain that here I'm gonna use this little receiver which is compatible with my radio fr sky it's very small unlike weight it's very cool that it has the same connectors of the servos and I had to modify the connector of the ESC as well in the description below I'm going to leave all the links of all the products that I recommend to build this airplane don't worry if you don't find a very small receiver you can use a bigger one but just bear in mind that it will be heavier it won't be impossible to fly it but just a little bit heavier now it's a matter of finishing the details I have to put the control horns for the ailerons and some little push rods made out of wire to control them at this point it is important that you haven't fixed the servos yet that way you will have more freedom to move them around and connect the push rods and we finish the wind with the wind dips or vertical stabilizers let's recap the electronic components that I've used I'm using a brushless motor 1106 with 38 Hendrick heavy I'm using a very small and lightweight ESC cable of 12 amps although I can recommend others that will be able to provide the 5 volts this is the most lightweight configuration that I could find but this wind can stand larger motors for more power the propellers are 2 inches 3 blade and they just work fine with this motor and the servos are ultra micro servos which have the advantage of feeding anywhere because they are so small but the disadvantage of not being that powerful or not enough torque but these are gonna be alright for this wing and battery wise the maximum that I'll recommend is 1,000 milliamps of capacity for 2 or 3 cells if you're using a 4 cell battery then you should use a 500 milliamp battery I've been using mostly 500,000,000 batteries for 3s and they work just fine for me if you are planning to use four as batteries for maximum power you should get the right motor in the description below you will find links to motors that will stand for s batteries now is the moment of the maiden flight I'm doing this first flight with a 2's battery and he could barely maintain flight so I swept with a 3s battery and that was a lot better [Music] I also experimented flying without the vertical stabilizers it was very unstable but in any case it is very fun to fly [Music] before any further flights I'm gonna give it a good look something that will make it stand out so I decided to make a simple design and paint it [Music] and there we have it a very good disdain Tech Floop it could be better but for now let's go on fly [Music] see ya take [Music] with this little motor and the combination with its propeller I'm not getting the maximum power that I would like to have but even though it's very respectful and it can fly in windy conditions with any problem other than taking a little bit the important part is that it's very fun to fly this wing there's no better feeling that looking at something that you created yourself flying and achieving the goal certain advantages of this model is that it's very small portable lightweight and if you crash it is very flexible so we'll take it very easily it flies great but I've noticed some things that I would like to improve in the next versions like enlarge endurance for our battery control and of course making a small fuselage where I can feed the battery and electronics more easily but I'm still impressed with this first version for how easy it was to build and fly that was super fun still we need to do some improvements to this wing so I'm going to do the second version where I'm going to enlarge the ailerons I need more throw more control over it I need to put a bigger motor this motor turns out to be very underpowered even using a 3s batteries I'm going to choose a slightly bigger motor with a bigger propeller so it propels the the wing at higher speeds and have more control so let's do that second version and see what happens but before making that second version I'll try to put another motor so that's what I did I tried this 1306 motor which seems to be a lot better and I put a 3 inches propeller [Music] so now let's fly and see what happens the performance improve a lot although you won't see in the video that difference in performance but I could tell the difference and it was definitely better I even used to s batteries and it could maneuver easier and maintain flight better than before right now I'm in the process of testing the new version joy wing 1.1 which is gonna be a lot faster and better in general the highlights of this new version is what I mentioned before it will have a fuselage larger ailerons and it will have a more powerful motor so I'm looking forward to go and fly it here you can see some of the images of what I've done so far but that will be for the next video next week for now I hope you liked this video remember that you can download the plans for free in the description below if you like these kind of videos consider subscribing and I'll see you in the next project [Music] you
- from
- Flying FPV
- added
- 2026-10-10
- likes
- 0
Flying FPV › Airframes > Fixed Wing / Planes 🛩️: “Simple race wing, 2019.”