Beginner GameMaker Tutorials
Tutorials from Shaun Spalding. A comprehensive introduction to basic features of the IDE. Highly recommended to check out the full playlist if you're a complete beginner.
transcript
Hello everybody. I'm Shaun Spalding and this behind me is GameMaker Studio 2. Which is probably something you already knew and probably why you landed on this video, and whatever it is you want to do, whether you want to make some hobby games. You want to take part in some game jams. You want to make a commercial game. Whatever it is you are trying to do, you're here. And you want to know how to use this thing. How do I use GameMaker Studio 2. It's a pretty big topic. GameMaker is one of the more accessible tools out there. And for my money probably strikes the best balance of most of the tools that exist currently, between being accessible and like easy to pick up versus being also quite powerful and versatile and allow you to make big complex things. Most tools tend to sort of lean one way or another. You know you got your Unities and your Unreals, and your Construct 2s, and all the different engines out there. For me GameMaker lands pretty well in the middle there between like accessible and like powerful. Alright what what means is while it is easy enough to get into, it is also very powerful and very big. You know you can spend your entire career learning and mastering just this one program. But neither of us have time for a whole career in this video, so we're just going to go over the basics and get you started. We're going to go over what a project looks like, what the key resource types are, and then at the end maybe we'll talk a bit about how to learn more. How to get better and ways to kinda carry on whatever journey you're starting out today, perhaps with this video. So this over here is what I have is a blank project, totally empty. This is what you'll see when you make a new project in GameMaker and a project is made up of its different resources which we have over here in the resource tree or the asset browser, all the different stuff that our game is made out of will be kind of listed over here. There a lot of different resource types, as you can see from all these sort of different default categories. But we're going to focus on three different types of resources, just the most basic building blocks of a video game. We're going to talk about sprites, objects, and rooms. So first of all let's take a look at sprites. So I'm going to make a new sprite. There's about a hundred and one different ways to make a resource type, so I did it right quick there. I just right-clicked in the workspaces, resources, create sprite. There's a bunch of new ones coming in 2.3 where I will probably have to make this video entirely from scratch. But even at that point, the fundamentals of GameMaker are always going to be the same, so most of this is going to be super relevant either way. So I've made a sprite. What is a sprite? A sprite is an image. Okay. All these kind of images in your game whether it be like your player character sprite or like the background images, just all of the artwork in your game is going to be represented in some way or another by a sprite. Okay. They can be animated, but they don't have to be. And they can be like any different size and this is where as I say, this is where all of your images go. I'm just going to name this one like sSmile and I'm going to go and hit the edit image button and we get this image editor. Okay where we can draw whatever we want. I'm going to fill this with yellow. And I'm just going to draw a little smiley face. This is is just, you know, you might be reminded a bit of MS Paint or something like this. It's like a simple image editing tool. Loads of different little options you got over here. Bunch of different things you can do. We can make new frames like this. And we can draw, if we play this, you can see it's like animating through the frames. Something you can do in this which is kind of cool specific to GameMaker Studio2. You can draw while animating. Which lets you do some fancy little effects, pretty niche little feature, but not a lot of image editing tools have that capability. So this is where you come just to do you know your basic image editing and stuff like that. You don't have to make all of your sprites inside of GameMaker, obviously, but it does have a tool to allow you to do that stuff. And edit you know all the individual frames of your artwork. You can bring in artwork as well. Let's just get this back to that smiley face because we're going to use that later. Oh one other thing I'm going to mention while we're here as well if you do use a bunch of this tool something you might not be used to coming from like other image editing tools is and not everybody likes this is copy and paste works a little bit differently. If I copy this or if even if I cut this what it does is it doesn't place whatever you copy or cut onto the clipboard. It instead creates a brush. I think it will also put it on the clipboard, so if you go into another tool I think you can still paste. I'm not 100% sure actually. But it creates like a brush which means that then if you want to place it somewhere else, you have to click specifically in the place you actually want to put it. Which some people don't like. But it does let you do some other cool things as well. Just something to be aware of when you're copying and pasting. You can still copy and paste from other tools into GameMaker, but when you do when you paste in GameMaker it still is going to take whatever is on the clipboard and put it on a brush, so you still have to click and place. Easier if you want to bring things in from other tools is to click the import button on your sprite. Okay. And then we can bring in artwork from outside of GameMaker that we may have made in PhotoShop or whatever ASprite or whatever tool it is that you use. One quick tip while I am here if you're making, if you want to make art specifically for GameMaker, you will notice, if I zoom in the editing maybe here, we've got I've named my artwork in a particular way. So you can see we got this four sprite, in fact let's look at a different one. Let's look at this one. sSlimeAttrack_strip6 down here, you can see I've got this little animation of a little slime doing a jumping attack. They're like evenly spaced in a horizonal row in like a little animation. I end the name of the file with strip and then the number of frames. So _strip6. An then if I bring that in, click yes to that. It'll automatically split it into the frames as needed which is very very useful. If you don't wanted to do that, you just want to bring it in as one image, you just don't name it in any particular way and it'll just bring it in as one frame. Okay. If your artwork and it's not already arranged in that particular exact way or named in that exact way the other thing you can do is go to image and import strip image and like if I like select the same thing, you can specify exactly like where each frame is how they're spaced apart and so on if you were to bring them in as animations that way. Okay. One other thing on sprites that we'll mention right before I moved on just because this is a little keyboard shortcut that escapes a lot of people's notice is that to move between these different animation frames you can actually press the 1 and 2 keys on your keyboard and just to move between the frames via that just a little quick trip because I know I didn't know that for a very long time. Pretty useful. Okay so I'm going to close this down now. Just come back to our, well I can just move it around. This workspace I've got here is like infinite. I can hold control and move the mouse wheel and sort of zoom out and press down on the mouse wheel and like pan around like that. There's a laptop mode that changes that in case you don't have like a scroll wheel and you're on a laptop. I can't remember what it changes it to, but it changes the sort of setup from panning around the workspace and most of the different resource types here other than rooms will open up in the workspace and you can kind of move between them like that. That's just how kind of how it works. But most of them are like so you can just maximize and just work on one screen like the image editor is maximized on these tabs and so on like that. It's fairly easy to move around. So let's talk about objects now. In fact before we do, I'm going to recreate this because I want that smiley face again because we're going to use it to do a thing in a bit. So let's just put this back into here. So we just have this smiley face sprite. sSmile starts with s because it is a sprite, so it is sSmile and we're going to make a new object as well again. A million and one ways to do it I already right clicked in the resource tree. A hundred and one ways to make a new things. Shortcuts as well you can press Alt+O or just right click in the workspace or just click create object. The object I’m going to call this oSmile starts with o because it is an object. You can see that's how I personally name all of my different resources in a GameMaker project. You can do it however you want. Most generally the accepted thing to do is to name them based on the type of resource that they are first. And then give them some sort of relevant name after that. Some people like to do obj_ that's how I used to do in some of my old GameMaker tutorials. Some of you will like to do like spr_ for sprite or there's a lot of or just spr without an underscore. There's a lot of different methods. It's just a good idea to name them with some sort of consistent scheme. I'm really lazy and I don't like to type too much so I just do one lower case letter that represents the start of it and then I capitalize the word afterwards that is the name of whatever I'm making so this is going to be oSmile and I'm going to tie this object to sSmile, which is the sprite that we've just made. So like you can link a sprite to an object. And an object is all of the interactive stuff in your game. Will be an object, likely. Okay. So think of things like your player, like if you're making a game about patrolling a space ship, your space ship player will be like an object probably. Enemies will be objects. Bullets. You know all that kind of stuff that's like interactive, collide with stuff, but also just more esoteric things as well like you might have a UI controller object or like a menu object, high score managers, those kind of things, right? Lots of different things can be objects. The point is that objects just carry and contain all the logic and interactivity of your game. Okay. So all the when the player does this then do this. And that's how they work as well. They work in a system of events and actions, which we'll come back to in a little more detail in a bit. But the main thing to understand here is you have this events window. We can add events into it, such as like the players press the left key and when this object or when an instance of this object is in our game it'll be checking to see if the player is oh that's the key up. That's the wrong one. Wants to be key down. Doesn't matter. We're going to come back to this later. So it'll be checking to see if the left arrow key is pressed down. Key up is if you let go of it, okay. We're going to be checking to see if that is happening. And if it is happening it will perform the events that we'll define in here. We'll come back to that though. That's sort of the core of how we actually code logic in the game. Before that I want to come onto rooms. So I'm going to open up room zero which gets created for us every GameMaker game needs at least one room to exist in order to run. And what a room is is it can be thought of as the game world. Alright. Or like the game, the game space, if you will. That's why it needs to exist for the game to run, to have anything to like show on the screen or anything like that. They can be used for all different kinds of purposes. You can have as many of them as you want. You name the different things. They can be different sizes. They don't have to represent like the whole screen of your game. You can have like a big game world and the camera is focused in on a small bit at a time. So on and so forth. Okay. You have layers in the room editor as well, so you might have like all your objects and your instances as they're called on one layer. And like all your art work on other layers and what layers do is basically at the most basic level they just control the order in which stuff is drawn, okay. So the higher up in the list this layer is the further forward a thing will be drawn so when two things overlap the one that's further forward will be shown to the player and the other thing will be underneath when they overlap. Okay. So in the room editor what we can do is, I've mentioned the word instances a few times. What we can do is we can place instances of our objects. So when you make an object, so our oSmile over here. We've essentially created a blueprint for that type of thing whether it be a player or an enemy or whatever else and then we can go ahead and specifically place it into our game world by just coming into a room. I have the object selected. I have the instances layer selected. If I hold the alt key down, you can see I've got this object underneath my cursor and I can just click and place one. You can also, you can drag them in. But that's a bit slow. I like to just hold alt and just click and you can click and drag and just drag in loads as well like that. You can then like resize, rotate, do whatever you want with it. Give it some specific creation code for this specific instance. So this instance is different in someway to other copies of oSmile that we've placed around the place. Do all kinds of things, okay. I'm just going to place one in the middle and we'll make it slightly bigger than a normal one is. You can place more and so on. Okay. Now that we have you know a game world and we have an object in the game, we can actually run the game. So if I press F5 or just click this little arrow, this little play button. It will compile. You see the game sort of compiling at the bottom down here. Well you can't because I'm in the way, but behind me, behind my chair, there's a bunch of text like scrolling up the screen you can see the game was like compiling. Okay. Okay. And with that done we have here our game. Made in GameMaker Studio 2 is the default. You can change all of that and the icon and all that kind of stuff. But this is our game. It's just a black rectangle with a smiley face in the middle. And that's all our game because we don't have any other logic or interactivity, okay. We just have this one room. This object in and while in all the default settings, the camera will show the whole room and what's in it. So that's where we get our object. So now that we know what those three resources are, those are the three resources you're going to have in any kind of game, or any basic game. You know, anything you're making as a beginner is likely going to be made up of sprites, objects, or rooms. Maybe sounds or scripts or a few others things. But for the most part, sprites, objects, or rooms. Let's come back to our object, oSmile, just double click it in the resource tree to reopen it. If you've lost it you'll come back to your workspace and get it open here. I'll just close down these other things as well. So as I was saying before, an object is made out of events and actions. An event is when something happens in your game, be it the user pressing a button, the passage of time, the object getting created or destroyed by some other code that's going on, these are like triggers, right, that will happen and cause whatever actions you've associated with that trigger to go off. Which then might cause other events and other things to go off and then so on. So for example, we've already added the key down left event here, which is an event that will trigger whenever the player presses the left arrow key, assuming this object, there is an instance of this object in our game, currently. And then in this window, we just have a text editor where we can write in gml code actions to carry out. Okay. This is where some of you are probably noping out like whelp, no there's programming. I was told there would be no programming. I was told GameMaker didn't need programming and I'm out. Just stick with me for a moment, because there is an alternative, okay. We'll get into a little bit about code in a second, but if I just right click this and go convert to dnd or when you make the project in the first place, you can set dnd to be the default. DND stands for drag n' drop. Then, instead of having a code window, you'll have this thing. I don't know what you call it. The DND editor where you can drag in prebuilt actions that just do specific things. So when key down left is pressed we could do like, it's tough for me, because I don't use drag and drop, I don't know how most of these things work. But we can set our direction, set direction fixed. Yeah we can just set our direction to 180 there. We don't even have to type that in. We can just click this little arrow. Set our direction to be the left and I think we can just give ourselves some movement. Right. Some like velocity, set speed right. Set speed and that'll happen afterwards. Speed in whatever we're facing to 5 pixels a frame. And then we have some logic. Okay, we've got like pressing the -- I'll just zoom right in here so you can see. So when we press the left arrow key we set our direction to 180. Directions they work from like starting 0 facing to the right and then they go anti-clockwise, so 90 degrees is up and 180 is left and so on, but you can just click the arrow anyway. So it's facing left, set the speed to five. If we ran the game now actually we still have our object in the middle of the screen if I press the left arrow key our guy kind of goes off the screen. Hey! We did it! We put some logic together. We made a thing happen in the game. Well done everybody. Congratulations. But I want to bring us back to the code. In fact, I think I can convert this. If I convert to GML, okay, yeah, you actually get, so if you write some DND logic, you can actually convert it immediately back into the code equivalent. Okay. So you can see here, we just have some text that just says direction = 180; and speed = 5; and that code will tell the game to do exactly those things that we were just doing. If we ran the game now, it would do exactly the same thing. Okay. So that's a good thing if you wanted to get, if you only know how to do use drag and drop and you've used it and you maybe want to get started in GML you can maybe convert some of your actions just to sort of see how it works. But I honestly, and I've said this multiple times before and my mind really hasn't changed in this over the years, I would always recommend if you want to take GameMaker even remotely seriously, start with the code. Okay. A lot of people I know think like I don't know how to code. I don't want to code. It's difficult especially artists as well technically tend to think I have an artist's brain, I can't do programming. If I can learn how to code, you can probably learn how to code. It's not that difficult. The key difference is that whether you learn how to code which is just writing script like this that's a bit like free form and telling the game what to do. It's a little bit harder at first because there's just quite a lot, there's a few walls to sort of get over and just sort of learning how it works to begin with. But it gets easier. As you go on. With drag and drop it will start quite easy like you saw there. I just sort of drag in a face left and move at that speed thing and it worked. But it will get harder as you go on and you're trying to do more complex things. It will never become impossible. The two different ways of doing the logic, the drag and drop and code. They have a relative parity in that you can basically do anything in one that you can do in the other, but it gets much more harder, much more difficult to manage drag and drop as you go along and work out weird kind of esoteric ways of doing things that would be much much simpler to doing code and in fact you can probably write, even that there, when I set direction there and move that way, trying to work out in my head with drag and drop how to make something move left. In code I can just write x=x-5; okay. And that means while we're holding our left arrow key down, our x coordinate, in 2d space we have an x coordinate which is horizontal and a y coordinate which is up and down, our x coordinate is the horizontal one. So by reducing it by 5 we go left. Okay. And that's doing the same thing. And also it's just doing it once, like we're not setting a permanent speed. So it's already better, right? Million and one resources to go and learn about code. In fact all of the resources out there pretty much 99 percent of tutorial content is going to use GML code, so that's already a positive in wanting to learn it. As I said, the main difference, drag and drop has it's place definitely. For people who don't really want to do a whole like, if you're just want to use this tool to make a quick prototype for an idea you have, maybe to show something at work if you're a game developer, or something like that and you're not really going to spend a whole lot of time in this tool and you want to get the thing going, then drag and drop might be for you, or for very very young people, but the vast majority of cases I would recommend doing the code, because the main difference is the drag and drop is easier right away but gets harder. Code is harder right away, but gets easier. And gets simpler the more time you spend with it. And GML the language that you use in GameMaker, I don't like comparing it to other languages a lot, but I suppose it shares the most in common with JavaScript and it's very very forgiving. Okay, it's one of the most forgiving programming languages that exists. I've put a semi-colon of here because it's like a good programming practice to end lines, but you don't have to do that in GameMaker. You don't even have to worry about what that means. You just do x=x-5 it will work exactly the same way. And like GameMaker there's a lot of stuff like that, where it will forgive a lot of your mistakes. As I said, it's quite easy to get into and surprisingly a decent foundation if you want to go on from there to learn another programming language. Actually like most programming languages in general are quite similar and I can learn a lot from just GML as a foundation to then go on to do learn other things, especially JavaScript as I've discovered quite recently. Okay so that's GameMaker, that's how a project exists in GameMaker and that's how the basics of how you start putting together a game in it. Where do I go from here? I want to make Undertail like RPG or I want to make an action RPG or I want to make a platform game or make a 3D FPS whatever it is you want to make in GameMaker, where do you go from here? I've only shown you how to make a thing move left. Well, good news for you as I was saying there are tons of resources out there. I, myself, have this channel, where I make a tons of different videos showing people how to make all kinds of stuff. I recommend this complete Platformer tutorial that I have up here. It's quite dense, like we go from absolutely nothing to making a complete platform game with like a menu and like an ending and all kinds of fun stuff in between. Lots of little cool game field things and we assume no knowledge. So it's teaching you all the code what every line does. How it all works. Bit by bit. Okay. Each episode like some of them are longer than others. You don't have to finish the series. If you go into it for a bit and get what you can out of it or what you need out of it, even if you're not trying to make a platformer, you know, you're still going to learn the code, all right. And that's what it's all about with game development, learning tools in your head and then learning how to repurpose those tools to do different things. Okay. As I said, I don't have that, I have a lot of general other stuff. Various tutorials on like meta stuff with GameMaker, like tips and tricks, melee attacks, as you can see just here. I have a lot of videos, okay. You can go and see them. I'm not the only person who has videos. We have others. There's loads of other people who do really cool stuff. I'll just recommend a handful of other people as well. We have HeartBeast. A lot of people like this stuff. He's super popular. He's also got some really cool, he does really nice pixel art. He's not like a you know specialist pixel artists by trade, but he gets by really really well and does some really good tutorials that are great for hobbyist game developers. I mean his stuff is really good to look at if you just want to be able to quickly make stuff that looks good, that isn't going to like you don't need ten years of mastering the actual art of pixel art. Because pixel art goes pretty deep. But if you want to learn like quick and really effective like, look at this stuff, hobbyist stuff looks super nice. So I really recommend checking him out, if you want to learn that stuff. So he also does Godot tutorials and a bunch of other stuff. Cool guy in general. HeartBeast, I recommend his work. A lot of people like this. Friendly Cosmonaut is a really good one. She's has a lot of stuff. She has this great farming RPG and other stuff that's kind of largely oriented around like RPG type of things. So if you maybe if you're looking at making some thing like an Undertail like RPG or that kind of thing, her content is going to be great for you. Things like you know state machines and text boxes. Eight directional movement. And all the sort of stuff that would go like into a Farmville game and those kind of things. All that sort of stuff she's got a lot of videos for. Another one, Pixelated Pope, I don't think he's actively making videos at the moment, but the ones he's had are stalwart, solid videos that like you put a lot of time and effort into. Generally if you get anything out of his videos, you can be fairly sure it's good. Like it's good content and well researched. One of his particular is like 15 Commandments of GameMaker may be for people a little bit more experienced. In fact, a few of his videos in general are like sort of not necessarily like dead beginner level, but sort of intermediate level pushing on advanced. He's got a lot of cool just lot of like good tips and tricks and more of those sort of advances uses of GameMaker and things like that. So I recommend all of those guys. Another place I highly recommend is r/gamemaker. Also the community forums. I forgot to bring them up on here, but that's a good place as well. The problem with the community forums is sometimes you find data that's out of... Sometimes you'll find information that's a bit out of date. But it's more or less the GameMaker community forums is more or less the StackOverflow equivalent of GameMaker, you know you Google a problem you're probably going to find a thread about it on the GameMaker community forums. There's usually other people having similar issues to you. You will be able to find a lot of information that way. But also the GameMaker sub-reddit very similar in that regard. A lot of Google searches will bring you here. Loads of people looking for help. Lot of people writing answers and providing that help. A lot of tutorials a lot of great content in general. Very very cool place. Run by very cool people. Speaking of those people, I highly also recommend the GameMaker Discord that I have up here. I'll just move it because I need to, so you can kind of see the channels, because I'm noticing I'm in the way. We have like a whole bunch of like different channels. We have got four separate help channels. They are all currently busy as people come, oh wow that's one of my tutorials there. Someone apparently struggling with or something. But you can just ask questions in here and people will help you out assuming that they have like bots to mark them busy as unbusy and that kind of thing. But I hang out here a lot and just talk about different things in GameMaker. A lot of different people with a lot of experience with GameMaker hang out here. It's one of the best places to go. It's just one of the best places just to be in general if you want to learn stuff about GameMaker. One of the main reasons for that is that as I said with sometimes you Google things you're going to find information that's a little bit out of date. If you want to stay really current with what's going on with GameMaker and especially some of the new changes coming out with 2.3, a bunch of exciting stuff, I really recommend being a part of that Discord because it's going to be full of all the people who are experimenting and learning with that stuff in real time. And it's where I go to get a lot of research for a lot of my videos and be like hey, I'm thinking of doing a video about this, and I'm doing it in this way, can anyone think of a better way of doing this and that kind of thing. It's a really great place. As I said, a lot of the sort of modern experts in GameMaker, a lot of them hang out in that discord. It's a great place to do. If you do go there, I'm in there. Please don't DM me about my tutorials and ask for help with my videos and stuff in that Discord. It's not what it's for. It's literally against the server rules. Please don't do that. Anyway, moving on, so yeah, the Discord's really great. The manual, how did we forget the manual? This probably one of the most important things hopefully you didn't stop watching before this point, because this is very important. The manual. It exists. Just press F1 or go to, or press F1 in here and you'll get the manual up. I recommend reading the quick start guides and all that stuff and just like that will all familiarize yourself with all the other stuff that I haven't had time to go into in this video, but also the code reference, the GML reference. This is all going to be your best friend right. Go to the, yeah, getting lost in the manual myself here. But just like the scripting section and these like this index, a lot of how I originally learned GameMaker with 1.x was literally just reading the manual whenever I wanted to do anything. Alright? Sure there was articles and things I was reading, but typically like, if I wanted to know how to do something, GameMaker has more or less, has a lot of function designed to do most of the common tasks involved in making a video game. So I'm like okay, I want to learn how to make some thing collide with another thing. Okay there's this section called movement and collision, let's go to that. Let's go to collisions and find a function that sounds vaguely like something I might need. Collision rectangle. Well how does that work? And then I can just read and it will tell me how it works. How to use it. It will give a little example. The documentation is not always super well maintained and some of it can be out of date and tricksy but for the most part it will be really solid and will get you a really really long way. And you'll always have to keep referring to it. Never worry about that. A lot of people will ask like, I've been using GameMaker, but I still have to keep referring to the manual all the time. How do you get to the point where you just know all this stuff? You never do. Never happens. You will always be referring to the manual. There are three things certain in life, death, taxes, and needing to check the documentation of your programming language. You just are going to have to do it. So get used to doing it. Other quick tip when you're, when you got code and you've written a function say PlaceMeeting() is a common function and if it's yellow you can middle click on it and it will bring the manual up at the exact page of that function. Very very useful. And then you can read it. Learn how it works. There you go. Golden. Okay, so I mean I really could go on for hours, but that's the very basics of GameMaker and making games with it. And also places to go if you want to learn more. If you liked this video you can do all of the various YouTube things that you do to express that you liked a video that are useful for me algorithmically. You can like the video. You can subscribe to it. Share it with somebody who you think might want to get into game development or picked up a copy of GameMaker and doesn't know what the hell to do now. I also have a Patreon and those people on Patreon who spot me are the only reason I get to do any of this. I'm pretty much supported entirely by then. Yes there's ads on my video, but my Patreon is the vast bulk of what keeps me doing all of this work. So if you want to be one of those guys because you think the work I do is kind of important and want other people to be able to see it, want more guides like this to exist, there's a link in the description. They also get some of the bonus goodies too. You can go check that out. All the information is there. And with that, I'm going to say thanks for watching. Thanks for sticking around to the end guys. A huge special shoutout in no particular order to the following patrons [CREDIT]
- from
- GameMaker
- added
- 2026-10-10
- likes
- 0
similar
-
Advanced GameMaker Tutorials youtube.com
Tutorials from DragoniteSpam that dive into more advanced topics related to the GML language. They also have comprehensive 3D and shader introduction videos.
-
Shaun Spalding youtube.com
Previous community manager at YoYo Games. Has a wide variety of beginner-friendly GameMaker tutorials and helpful updates on new GameMaker features.
-
-
-
GMS2 Platforming System benal.itch.io
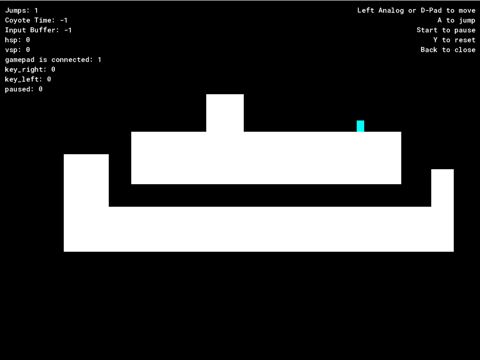
GameMaker implementation by Ben Allen and an expansion on Shaun Spalding's original 1.4 platformer tutorial.
-
Let's Learn This Together youtube.com
Small indie dev company with a focus on providing GameMaker guides.
GameMaker › Getting Started: “Tutorials from Shaun Spalding. A comprehensive introduction to basic features of the IDE. Highly recommended to check out the full playlist if you're a complete beginner.”